Saturday, May 29, 2010

Quinoa Black Bean Burgers...


Quinoa and Black Bean Burgers from GFfarmgirl's kitchen

1 Cup cooked Quinoa
2 Cups Fresh black beans or 14 oz. can Black beans
1 egg slightly beaten
3/4 tsp. salt
1 Tbsp. Onion Powder
1 tsp. Ground Cumin
1/4 tsp. Ground Oregano
1/4 tsp. Cayenne Pepper or Chili Powder (optional)
2 Cloves Freshly Pressed Garlic
1/4 tsp. Black Pepper (optional)
3 Tbsp. Extra Virgin Olive Oil
1 tsp. Diced green chili peppers
1/3 C. Fine dried Gluten-Free Bread crumbs (optional)
(optional additions: 1 Tbsp. chopped cilantro, 1/4 Cup shredded carrots, or other spices as you desire.) All spices can be increased or decreased according to your liking.


  1. Blend all dry spices together, including salt and pepper. Add remaining ingredients: black beans, egg, quinoa, including oil and mix with spoon. Add to a food processor and pulse until combined but slightly chunky. (If you don't have a food processor, mash with fork until beans break apart.)
  2. If you used breadcrumbs you can form the patty with your hands. If not, then spoon enough mixture onto the skillet to form a patty (2 large tablespoons) and slightly press with spatula to form a patty.
  3. Heat olive oil in a stovetop skillet and add patties.
  4. Let cook uncovered over low-med. heat for 7 minutes or until when moved it holds together well. You may need to use the back of a spatula to press the edges together and round the patty before and after turning.
  5. Flip (if it comes apart, just carefully round the edges with the back of a spoon and re-form) and cook other side until heated through and brown.
  6. Carefully remove patty from heat onto a bed of lettuce topped with heirloom tomatoes and wrap or a gluten-free bun.
Because I have to use salt sparingly, keep in mind you can salt your patty after cooking, as I have only used minimal, but hopefully it'll suffice.
Also, I don't use the breadcrumbs but it is rather easy to just reform the patty and let it cook. Once cooked through it holds together well.  Enjoy!

Thursday, May 27, 2010

Big Juicy "Heavenly" Chicken Nuggettes


Remember all those trips to the fast food joints, chicken nuggets galore.  My daughter loves these things and the bummer was that she couldn't have them any longer, until I created this delicious recipe.  Now, she doesn't have to go without.  She loads her plate with these baby's and our homemade ranch sauce and voile, she's in heaven...or the next best thing!

Big Juicy Chicken Nuggets
 Need:
1 pkg. of six boneless chicken breasts
1 gallon ziploc bag
1 1/2 Cups Blanched Almond Flour 
(you can purchase this at   http://honeyvillegrain.com/contact/Contact.html  ).
1 Tbsp. Dried Parsley
1/4 tsp. Garlic powder
3/4 Tbsp. Dried Onion Powder
1/4 tsp. Cayenne Pepper (optional)
1 tsp. Salt (optional, but best!)
1 Tbsp. Paprika powder
1-2 eggs, mixed well.
Olive Oil

*Rinse off chicken and pat dry.  Slice each breast into 1/2 " slices.  You may cut it into as big a strip or chunk that you like.  Set aside.  
*Add Almond flour and all herbs and salt to ziploc bag.  Shake well until all ingredients are combined.  Set aside.
*In a bowl mix:
1-2 eggs, whisk until well blended.  Set aside.

*Preheat oven to 350 degrees.
*Line a cookie sheet with foil and grease with Olive oil. 
*** Take each piece of chicken and dip into the egg mixture, put into baggie with the dried ingredients, seal the baggie and shake well.  (*I add about 5 pieces at a time, close the bag and shake.  This allows ample coating of the chicken.).  Once all chicken is coated, place on cookie sheet and bake uncovered for 25 minutes (turning each piece half way through the baking time) or until golden brown or juices run clear.  This will cook quickly so keep an eye on it.
Make sure that you do not have too much egg mixture on the chicken as this will clump the baggie mixture and you will have less coating for the chicken.

Wednesday, May 19, 2010

Crunchy Spice Cookies...


I love these cookies.  They have a nice little crunch, because of the grapeseed oil I use.  It also adds a nice golden brown color. 

3 Cups Blanched Almond Flour
1/3 tsp. Salt
1/2 tsp. Baking Soda
1 tsp. Ginger(or 1 tsp. Cinnamon plus 1/2 tsp. ginger)
1/4-1/3 Cup Pure Maple Syrup
1/8 Cup Grapeseed Oil 

Mix dry ingredients together well.  Add in all wet ingredients and mix well to form a dough.  Once mixed, just grab enough for the size cookie you desire and drop it on a greased or parchment paper lined cookie sheet.  No need to form the cookie.  It looks better with the rough edges.  Let bake at 350 degrees for approx. 10 minutes or until edges are golden brown.  Makes 1 doz.  (depending on the size of the cookie you choose).
Enjoy!

Monday, May 10, 2010

Stuffed with anything...French Toast bits!


Another yummy breakfast that hits the spot.  Using some pre-made gluten-free bread, you can do this in a snap.  If you don't have any, I use this recipe from Elanas Pantry.
http://www.elanaspantry.com/gluten-free-bread-20/  However, I do omit the flaxseed & the vinegar: I replace it with 1/4 cup canola oil.  I also use honey in place of agave.  If you choose to leave in the flaxseed, it will add Omega's to your meal.  I like this bread recipe because it's rather course and dry and holds together well when cooking.
Slice the bread in 1/4"-1/2" slices.
Spread "Smuckers Simply Fruit Apricot" spread over one piece of the bread. (you may also puree some other fruit-peaches, apples, etc. and use it.  You may also use, peanut butter and jelly, almond butter and honey, whatever floats your boat.)
Spread some cream cheese over the other piece.
Sprinkle with cinnamon.
Sandwich them together.
Cut the sandwich into 1/2" slices (as shown below).


In a small bowl add: (This mixture is enough for 3 sandwiches)
1 egg
1 1/2 Tbsp. Milk (if too eggy, add a little more milk)
1/2 tsp. cinnamon
1/2 tsp. pure vanilla or almond extract
Whisk with a fork until well blended. Dip each piece of the sliced sandwich into the egg mixture and put into a heated greased skillet. Cook on low-medium, turning until each side is golden brown.  I like to serve my bits with a side of fruit and a small dipping bowl of  rasberry, blueberry or pomegranate Kefir or top with pure maple syrup.  This is one meal that can be eaten just by itself...Enjoy!

Saturday, May 8, 2010

Orange Almond Chicken


Orange Almond Chicken
8-10 chicken thighs (If you like the skins, leave half on, half off.  This increases the fat content, but adds to flavor).
1 Tbsp. Olive oil
* Optional: 1/2 Cup Whole Almonds
In a large skillet, on medium heat, pour 1 Tbsp. Olive oil.  Place chicken, smooth side down, around the pan, and slightly salt. Cook uncovered for 20 minutes, until underside is brown.  Then turn and cover, cooking an additional 40 minutes or until done.  While this is cooking prepare the sauce (see below).  Once sauce is prepared, and meat is nearly done, sprinkle almonds over the chicken and pour 1/2 cup of mixture over the top of the chicken and bring to a simmer (low heat) for 10 additional minutes.  *Place the chicken on a serving plate or on a bed of rice and pour remaining sauce over chicken.  Sprinkle 1/2 tsp. lemon zest and 1 tsp. orange zest over the top.  *Optional:  Sprinkle grated almond over the top of the chicken.
Tip:  Serve on a bed of rice or quinoa...Lovely with a side of fresh asparagus or green beans.
In a medium saucepan add:
1 1/2 Cups Water
3/4 Cup freshly squeezed orange juice
1/2 Cup freshly squeezed lemon juice
3 Cloves garlic, minced
1 Tbsp. Orange Zest
2 tsp. Lemon Zest
2 tsp. Freshly grated Ginger Root (can use dried)
2 Tbsp. grated onion
3/4 Cup Brown Sugar
1/8 tsp. Salt

Bring these ingredients to a boil and then turn on low and simmer while you add the thickener (see below).

In a small bowl add:
1/4 Cup Arrowroot powder (starch)
1-2 Tbsp. Water to thin
Stir this well until blended.
Slowly add small portions to the sauce mix and stir continuously.  It is not necessary to add all of it, once you notice thickening, stop.  If it's too thick, add a little water and stir.  Once thickened, turn on low for 7 minutes and then turn off.

Ginger-Lemon Balls


Ginger-Lemon Balls:
2 1/2 Cups Blanched Almond Flour
1/4 tsp. Salt
1/2 tsp. Baking Soda
1/2 tsp. Pure Almond Extract
1/4 Cup Honey
1/2 tsp. Ground Ginger
2 Tbsp. Freshly squeezed Lemon juice
1/8 Cup Canola Oil
In a bowl mix, almond flour, salt, baking soda, and ginger until well blended.  Add almond extract, honey, lemon juice and canola oil in small bowl, mix until well blended, and add to dry mixture.  Mix well until ingredients begin to form a clumpy ball.  Roll into 1" balls and place on parchment lined pan.  Bake at 350 degrees for 7-10 minutes, until slightly golden brown.  Dust with some powdered sugar or the following frosting.
Ginger Frosting:
1 tsp. ground ginger
3 tsp. Honey
2 Tbsp. freshly squeezed lemon juice
1 Cup "Wholesome Sweetners," Powdered Sugar (I use the tapioca base one, because it is corn free).
(add more lemon juice to create a thinner frosting, more like a drizzle.  Follow recipe for a thicker version.)
Mix these ingredients well.  If using the tapioca-based powdered sugar, you must use the back side of a spoon and while mixing, press against the bowl to eliminate the clumps of sugar.  Stir until well blended.  Frost and top with cinnamon and zest of lemon.  Place in freezer or refrigerator for long-term use.

Easy Peasy..Chocolicious Cupcakes!


Okay...here's something easy peasy!  In a hurry and don't have time to devote in your kitchen whipping up something from scratch...Use this recipe for creamy chocolate cupcakes any time you're pressed for time.
I made these yesterday for my daughter and thanks to Bob, he's done most of the work for me.   I just put on the finishing touches and some extra special secrets...
Using "Bob's Red Mill," gluten-free Chocolate Cake Mix:
*Follow package directions (FYI-I've omitted both the vanilla and the lemon, and they come out equally great-I've also substituted almond extract for the vanilla). 
*Add 1/2-3/4 Cup of "Guittard" Semi-sweet Chocolate Chips to the batter. Stir.
*Pour in to cupcake baking cups and bake as directed.
*Cool cupcakes
*In a glass dish add the remaining chocolate chips, and heat for 40 seconds at a time, stirring in between heatings...once completely melted and cupcakes are cool, spread like frosting over the top of the cupcakes.
Allow to cool.
*To speed up the process, set them in the fridge or freezer for a few minutes only, this will harden the chocolate and makes it easier to transport and eat (less mess!).
*Tips:  You can also dip a strawberry in the chocolate and place it on the cupcake.  Just make sure you have some really beautiful berries, and this will be a stunner.
*Add a dallop of peanut-butter, or some whole almonds dipped in chocolate, placed on top.
*Whatever you want to dip, that goes well with chocolate would look great.
*Use your imagination and it's sure to be a crowd pleaser.

Thursday, May 6, 2010

Luscious Lipsmakin Burgundy...Juice!


1 Small beet, washed, stem removed
2 Granny Smith Apples Cored
2 Large Carrots peeled and washed (stem end removed)
Fresh ginger, grated

In a juicer, add the beet, apple, carrots into juicer.  Pour into glass stir, and top with freshly grated ginger.  This is filled with phyto-nutrients.  Enjoy!
A word to the wise, make sure your brain is in tact before using the beets.  This morning I flipped my cutting board and all the freshly cut beets went everywhere...it stains mind you, and so now I have lovely pink shoelaces...cute!
Nutrition Information: (check out these websites for the breakdown of nutritional info.)
http://www.livestrong.com/article/90117-nutritional-values-root-crops/
http://www.livestrong.com/article/85684-nutritional-analysis-apple/?_f=mlt&_d=2
http://www.livestrong.com/article/93159-medicinal-properties-ginger-root/

Second Day...fash wash!

Yesterday I developed a recipe just for your face.  I tried it yesterday and loved it, I used it last night with my make-up on...it removes the make-up (I did not try it on the eye make-up) and I'll try it again this morning.  I will also try it on my daughter and husband tonight.  Oh, how I love to experiment of family...such good guinea pigs.  Olive oil is the only moisturizer I've been using...I've always thought the Italians had such svelt and dewy skin, beautiful, to say the least. 

Wednesday, May 5, 2010

Lemonish Talapia Salad


Lemonish Talapia Salad

2 Cups cooked Quinoa
3/4 Cup Shredded Carrot (lightly steamed or fresh).
1/2-3/4 Cup Chopped Broccoli Flowerettes (lightly steamed or fresh).
1 Med. Clove of Garlic-minced or pressed
2 Tbsp. Chopped Brown Onion
2 Large Lemons Halved (seeds removed)
2 Talapia Fillets Cooked ( Over med. heat,  add 1 Tbsp. Olive Oil to pan, add fish fillets, squeeze half the lemon over the fillets, adding 1 tsp. dried parsley, and sprinkle "Pike Place Fish-Northwest Seafood Seasoning," over fillet until covered, cook approx. 5-7 minutes and flip.  Cook until white and flaky in the center.) Cool slightly and shred.
Pinch of Celtic Sea Salt
Pinch of Tumeric
Pinch of Ginger
1-2 tsp. Onion Powder
2 Tbsp. Best Foods Mayo (gluten-free)

Allow cooked items to slightly cool.
Combine quinoa, carrots, broccoli, pressed garlic, onion and talapia.  Squeeze lemon over combined ingredients and gently stir together.  Add celtic sea salt, tumeric, ginger & onion powder, stir in.  Add mayo and fold ingredients together.
This is a wonderfully fresh meal.  It is important to cool the ingredients before adding the mayo.
Some of the important benefits of these ingredients are in the use of fresh, onion, garlic, & broccoli.  These ingredients have been found to help remove the excess estrogens from our bodies, which if left, can cause numerous health issues, including cancer.  So, think of it as a medicinal salad if you will and enjoy!

Foodie Facial....Your gonna love it...and so will your face!


I love the fact that my blog not only conspires to address the gluten-free food issue, but the foodie facial issue as well.  I love natural products and I'm often found creating another concoction related to beauty one way or another... If you want a natural face wash, try this at home.  ***Do not use if allergic to nuts!
Almond Yogurt Moisturizing Facial Wash
1 Tbsp. Blanched Almond Flour
1 tsp. (2 tsp. for a drier complextion), Extra Virgin Olive Oil
2 Tbsp. Mountain High Original Style Yogurt (Plain with 3.25% milkfat).  + 2 tsp. of the liquid in the yogurt.
(Keep Refrigerated)
Mix in a baby food jar.  Take a small portion about 2 tsp. and gently massage in a circular fashion on your face and neck, and lips... Use enough to cover face, like a regular wash.  Massage for approx. 60 seconds.  You will feel the Almond flour begin to exfoliate your skin.  The yogurt helps your skin maintain a proper ph level, and the olive oil is a wonderful moisturizer.  Remove with a damp cloth.  As a final rinse, splash cool water over your face and gently pat your face dry.  If extra moisture is needed.  Take a drop or two of the olive oil and massage into fingertips, pat fingertips on face and gently stroke in an upward motion.  Your skin will look svelt and beautiful.  I did this this morning and was pleasantly surprised.

Tuesday, May 4, 2010

Sweet Laced Almond Brittle...

Who doesn't have a few nuts in their kitchen?  I have plenty of nuts...sports nuts, health nuts,  not to mention those in my kitchen!  This morning, needing a snack to add to my daughters lunch, I thought, what better way to sneak in some low-fat protein than to add almonds.  The dilemma was that she doesn't really like them plain.  So, hence this recipe.

Sweet Laced Almond Brittle...
On medium heat, in a small skillet add:

1/4 Cup white sugar
1 tsp. butter (may add additional teaspoon to create a more gooey caramel.  Tip: *If there is too much butter it will not stick to the nuts.)
pinch of Salt
Stir constantly, until mixture turn a light brown and sugar has dissolved.  Remove from heat.  Add 3/4 Cup Almonds (not blanched!).  Stir and fold into caramelized sugar.  As the sugar cools it will begin to harden.  Spray a glass dish and separate (approx. 5 almonds per piece) into the dish and allow to cool completely.  Add the separated pieces to a baggie and enjoy as a snack.

Monday, May 3, 2010

Farm-style cooking...balance of quality and quantity!

You'll find with my recipes that they do not contain, gluten, soy or corn.  Both my daughter and I have continuing struggles with these foods.  I will provide inter-changeable ingredients that can be used or omitted altogether.  Down home farm-style cooking is all about a balance of quality and quantity.  We all have one thing in common, we have to eat and we love food.  Okay, two things! It's no fun having to constantly worry about filling your tummy if everything you lay your eyes on is out of reach for you because of tummy issues.  My hope is to provide you with resources besides my own for you to find your happy little niche in your own kitchen.  Above all, don't stress!  Many of the necessary ingredients can be purchased online or at your local grocer.  If you have questions, feel free to ask.  I'm just familiarizing myself with how to set everything up, so be patient and soon enough I'll have this blogging thing down. 
Your gluten-freefarmgirl

Simply Sorghum Shortloaf...


1 1/2 Cup Brown Rice Flour
1/2 Cup Sorghum Flour
2/3 Cup Arrowroot Flour
1 tsp. Salt
(Mix these ingredients together.)

Add:
1 3/4 Cup Warm "Pacific Foods" Rice Milk (any gluten-free milk will do- rice milk is non-dairy).
1 Packet yeast (5/16 oz.)  I use Hodgson Mill or Fleischmans yeast.
2 Tbsp. Honey, Sugar or Pure Maple Syrup (Whichever sweetener you prefer).
3 Tbsp. Canola or Olive oil.
2 eggs (or 3 egg whites)
***(Don't be startled that this looks runny, it will not look like your traditional bread dough, as rice flour needs plenty of liquid to absorb, to give it that moist texture.  It will look similar to a pancake batter, so don't stress...it's normal).
Mix all ingredients very well, scraping bottom of bowl to mix all dry ingredients with the moist.  Pour into oiled or sprayed pan, cover with wax paper and set in warm place to rise, approx. 20 min.  You do not want this to rise substantially, as this will create more air bubbles and a less dense bread for cutting.  When you see the yeast start to activate (bubble) and rise approx. 1/2 inch, put into oven and bake at 350 for one hour.
Let cool in pan for 15 minutes in cool place.  (While still warm, spread some butter over the top the avoid crumbling when cutting).  Then loosen sides with knife and lightly tap on edge of counter to gently remove bread from pan.  Let sit on cooling rack to completely cool.  You may refrigerate the bread to ensure easier cutting.  Once completely cool, cut into 1/4"-1/2" slices and put into gallon freezer bag and freeze.  When you want to use the bread, simply remove from freezer and take a butter knife and gently wedge in between the pre-cut slices to separate.  Microwave for a few seconds before use.  This ensures a longer lasting loaf, as this type of bread will begin to ferment in a couple of days if you keep it out.
Tips:  Use the bread frozen to make sandwiches that contain mayo.  This will keep the mayo fresher and by the time lunch rolls around, will be ready for eating, still cool, if it's wrapped in foil.
Use the frozen bread for french toast.  Just dip right into your batter and cook.
The left over crumbs can be used for croutons.


Croutons:
On medium heat, add 1 Tbsp. Olive oil to pan, add bread crumbs, add favorite herbs like, onion powder, garlic powder, parsley, and a pinch of salt, stir until lightly browned.  Keep in brown paper bag until ready to use.
Enjoy!

Sunday, May 2, 2010

Simple Jacks! from Kami's Kitchen...

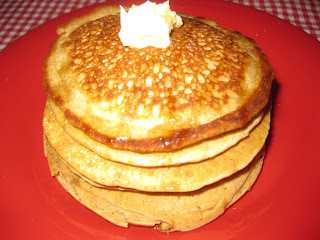
If it's one thing country folk like, it's yummy food and lots of it.  No country meal would be complete without the beloved flapjack/ pancake breakfast...lots and lots of thick, fluffy, panjacks or flapcakes.  This is one wonderful meal that can be topped any way you like.  I've seen topped with eggs, hollandaise sauce and cheese.  It's neutral enough to spice it up or sweeten it.  We like it topped with butter, pure maple syrup, honey or jam.  No matter how you do it, it'll fill your tummy and put a smile on your face.  As all recipes on this site, this one is created in my kitchen as well...  Among all the pancake recipes I've created or tried, this is my favorite and my kids as well.  Mostly because it's yummy and for the cook it's completely simple.  I have provided many ingredients that can be added or removed and you still end up with a yummy jack!

2 Cups Brown Rice Flour
2/3 Cup Arrowroot Flour (starch)
1 tsp. Salt (celtic sea salt or regular)
1 tsp. Baking soda
2 tsp. Cream of tartar
1 egg (optional)
2 tsp. Pure Almond Extract (optional)
1 1/3 Cup Pacific Foods Rice Milk (gluten free) or regular milk
2/3 Cup Water
2 Tbsp. Honey or Pure Maple Syrup (optional)
1 1/2 tsp. Cinnamon (optional)
Pinch of Nutmeg (optional)
Pinch or Ground Coriander (optional)

Mix dry ingredients together.  Add remaining ingredients and mix well.  Pour into greased pan and cook until bubbles start to present, then flip.  Top with any goodie you like...(This recipe is best when followed as directed, especially with the spices...however, it's still yummy if you can't have any of the *optional ingredients. If you find these are too thick, increase the liquid by 1/4 cup. Give it a try and see what you think.  Please remember to site my blog at Kami's kitchen the gluten-freefarmgirl.  Thanks and have a wonderful meal!